Lighting fundamentals
The Complete Guide to Layered Lighting for Interior Designers
Layered lighting is not the act of adding a cove, downlights and a pendant. It is the design of independent visual roles that work separately and together.
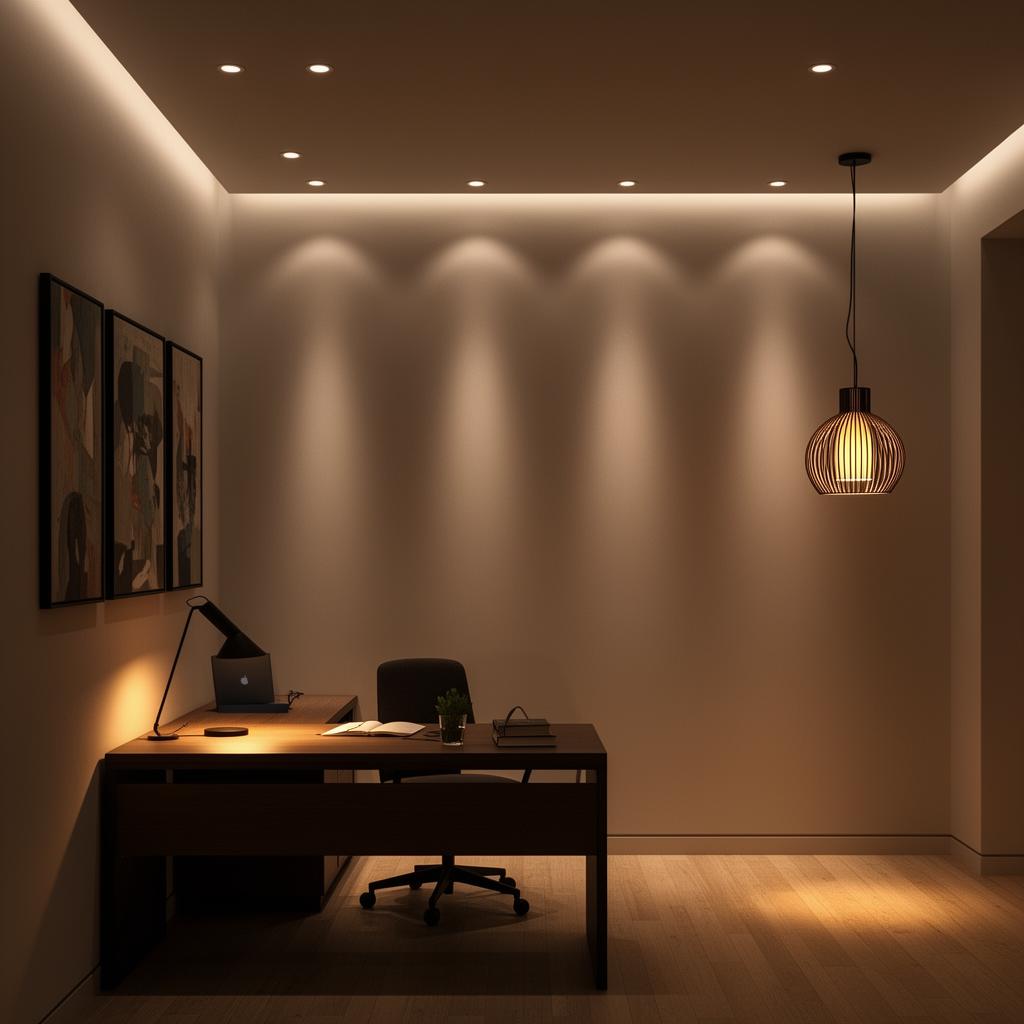
Layered lighting is one of the most repeated phrases in interior design.
It is also one of the least understood.
A ceiling with downlights, a cove and a pendant is often described as layered lighting. But three fixture types do not automatically create three useful layers. If they all illuminate the room in the same way, operate together and compete at similar brightness, they are simply three sources.
A lighting layer is defined by purpose.
It performs a specific visual or functional role. It has a clear relationship with the architecture, activity and other layers. It can often be controlled independently so that the room changes according to use.
That is what gives an interior depth, flexibility and atmosphere.
Think in effects before fixtures
Before drawing a downlight, decide what the room needs to reveal.
Ask:
- Where will people sit, stand and move?
- What tasks require clear light?
- Which walls, materials, art or objects deserve attention?
- Where should the room feel bright?
- Where can it remain dark?
- What is visible from adjoining spaces?
- How does daylight enter?
- Which decorative fixtures are important to the design?
- What scenes are needed through the day and evening?
These questions produce lighting roles.
Only then should the designer decide whether the effect comes from a recessed spotlight, linear profile, pendant, floor lamp, wall light, track, concealed source or another luminaire.
This prevents the plan from becoming a catalogue of products.
The seven useful lighting layers
The classic description of layered lighting includes ambient, task and accent light. That is a good starting point, but interiors often need a more complete structure.
1. Orientation and ambient layer
This layer makes the space legible and supports general movement.
It does not have to create uniform brightness everywhere. In many residential and hospitality interiors, soft light on selected vertical surfaces creates a more comfortable ambient impression than a ceiling full of downlights.
Ambient light may come from:
- Reflected light from a ceiling or wall
- Wide-distribution recessed luminaires
- Wall washing
- Indirect coves
- Large decorative fixtures
- Integrated joinery light
- Daylight
The ambient layer should answer: can a person understand and move through the room comfortably?
It should not automatically become the brightest layer.
2. Task layer
Task lighting supports a specific activity.
Examples include:
- Reading
- Food preparation
- Working at a desk
- Applying makeup
- Dressing
- Serving at a bar
- Studying
- Craft or detailed work
- Cleaning
Task light should arrive on the task without being blocked by the person doing it. A kitchen downlight behind the user's head creates a shadow on the counter. A bathroom downlight above the head can leave the face poorly lit. A bedside spotlight can create glare for the person beside it.
Good task lighting considers direction, position, contrast and control.
It may be integrated beneath a cabinet, placed beside a mirror, built into a reading light, suspended over a table or delivered through an adjustable luminaire.
3. Accent layer
Accent lighting creates visual hierarchy.
It directs attention toward art, texture, sculpture, plants, displays or architectural elements. It can also create depth by illuminating a background plane or distant object.
Accent light should be more controlled than general light. Beam angle, aiming, intensity and cut-off determine whether the feature is revealed or simply overlit.
Useful questions include:
- Is the beam suited to the object size?
- Does the light spill beyond the target?
- Is the source visible from normal positions?
- Does the object need uniform light or a deliberate gradient?
- Is the surface sensitive to light?
- Can the beam be adjusted if the art changes?
- Is the accent strong enough relative to the surrounding brightness?
An accent layer fails when every object receives the same spotlight. Hierarchy needs selection.
4. Vertical layer
Vertical lighting illuminates walls, faces, curtains, shelves and other upright surfaces.
It is one of the most powerful ways to influence how bright and spacious a room feels.
A room with bright floors and dark walls can feel harsh or cave-like. A carefully illuminated wall can improve perceived brightness without increasing the workplane level dramatically. Vertical light also supports facial recognition and social comfort.
Methods include:
- Wall washing
- Concealed curtain light
- Joinery and shelf lighting
- Mirror lighting
- Soft wall lights
- Light on columns or screens
- Reflected light from a vertical plane
Vertical lighting should not be confused with washing every wall. Select the planes that organise the view.
5. Integrated architectural layer
This layer is built into the architecture, ceiling, wall, stair, handrail, joinery or furniture.
It may create:
- A floating effect
- A luminous reveal
- Shelf illumination
- Step guidance
- Cove light
- Under-bench light
- Toe-kick light
- A concealed wash
- Light within a niche
Integrated light can make the lighting feel inseparable from the interior, but it requires detailed coordination.
The designer needs to resolve:
- Profile and diffuser
- Dot-free appearance
- Heat dissipation
- Driver location
- Access
- Reflection on glossy surfaces
- Cut-off
- Construction tolerance
- Dimming
- How the detail looks when the light is off
A glowing line is not automatically sophisticated. The line should strengthen the architecture.
6. Decorative layer
Decorative luminaires are visible objects that contribute to the identity and scale of the interior.
They may include:
- Chandeliers
- Pendants
- Wall lights
- Table lamps
- Floor lamps
- Sculptural installations
- Portable lamps
The decorative layer can create a focal point, human scale and emotional warmth. It may provide useful light, but its visual role is equally important.
A common mistake is expecting one decorative fixture to illuminate the entire room. Another is surrounding a beautiful fixture with so much architectural light that it loses presence.
The decorative and architectural layers should be balanced. The decorative source may be dimmed lower than expected while concealed light supports the room around it.
7. Night and low-level layer
This layer supports movement when the main scene is off.
It is especially valuable in residences, hotels, hospitals and hospitality circulation.
Low-level light may be integrated into:
- Skirting
- Steps
- Handrails
- Joinery
- Under-bed details
- Bathroom niches
- Corridor walls
- Floor-level wall lights
The purpose is not to recreate the daytime scene at lower brightness. It is to reveal the minimum information needed for safe, comfortable movement.
A late-night layer can protect sleep, reduce glare and make the control system feel genuinely responsive.
Daylight is not a separate afterthought
Daylight is the first lighting layer in many interiors.
It changes by hour, season, weather and orientation. It can reveal material beautifully, create glare, wash out displays or leave deep areas dark.
Electric layers should respond to daylight.
Near windows, ambient lighting may dim or switch off. Accent light may need higher contrast during the day. A decorative fixture may appear unlit against a bright window. Meeting rooms may need blind control. A residence may need a sunset scene that activates gradually as the exterior brightness falls.
Layered lighting should be designed across the full day, not only for a night render.
A layer should have one clear job
When one circuit tries to perform several conflicting roles, control becomes difficult.
For example, a row of downlights may be expected to provide ambient light, illuminate art, light the coffee table and support reading. It will probably do none of these particularly well.
Clear roles allow the system to be tuned.
A useful circuit might be:
- Living-room wall wash
- Artwork accents
- Reading lights
- Curtain light
- Decorative pendant
- Joinery shelves
- Night path
Each name describes an effect, not only a fixture type.
This also makes the control interface easier to understand.
Layering does not mean switching everything on
The purpose of layers is choice.
A room may have six layers, but a relaxed evening scene may use only three. A cleaning scene may use almost all of them at higher levels. A television scene may reduce the ceiling and keep soft background light. A dinner scene may focus on the table and selected vertical surfaces.
Possible residential scenes include:
- Welcome
- Day
- Entertain
- Dinner
- Relax
- Television
- Reading
- Night
- Cleaning
- All Off
Possible hospitality scenes include:
- Breakfast
- Daytime
- Sunset
- Dinner
- Late evening
- Event
- Cleaning
- After hours
Scene design is what turns a layered installation into a usable space.
Room-by-room examples
Living room
A living room may combine:
- Soft wall or curtain light for ambient brightness
- Adjustable accents for art
- A floor or table lamp for reading
- Integrated shelf light
- A decorative pendant or chandelier
- Low-level movement light
The ceiling should not automatically carry every function. Review the space from seated eye level and television position.
Dining room
The table is the primary task and social plane.
A layered dining scene may include:
- Controlled light on the table
- Soft light on faces and surrounding walls
- A decorative pendant
- Accent light on art or a sideboard
- Low background light in adjoining areas
Dimming is essential. The light needed for serving and cleaning is different from the light needed during dinner.
Kitchen
The kitchen needs:
- General ambient light
- Strong, shadow-free worktop light
- Light at the sink and hob
- Interior or wardrobe-style light in selected storage
- A softer evening scene when the kitchen is part of an open plan
- Decorative light at an island where appropriate
Under-cabinet light should illuminate the worktop, not only create a glowing strip.
Bedroom
A bedroom may include:
- Calm ambient or vertical light
- Individual reading lights
- Wardrobe light
- Dressing or mirror light
- Decorative bedside light
- A low-level route to the bathroom
- Bedside and entrance control
The main ceiling scene should not be the only way to enter or use the room.
Bathroom
A bathroom needs:
- General light
- Vertical mirror light
- Shower or wet-area light where required
- Accent or material light
- Night light
- Cleaning scene
The mirror layer should illuminate the face rather than create a bright source reflected in the eye.
Staircase
A staircase may combine:
- Low-level step or wall light
- Light on a landing wall or artwork
- Decorative vertical light in a double-height volume
- Handrail or concealed guidance
- A brighter cleaning or event scene
The safe route should remain clear without making the staircase visually dominant throughout the home.
Common layered-lighting mistakes
Adding every possible layer
More layers do not guarantee better design. Each layer should have a purpose. Unnecessary circuits increase cost, control complexity and visual noise.
Using only ceiling light
This creates a top-heavy distribution and often leaves walls, faces and materials weak.
Repeating one detail everywhere
A cove that suits the living room may be unnecessary in the bedroom. A downlight grid that works in an office may destroy a hospitality atmosphere.
Mixing colour temperatures accidentally
Variation should be intentional. Uncoordinated decorative lamps, profiles and downlights can make the room feel patchy.
Ignoring glare
A beautiful beam is useless if the source is visible from the sofa, bed or dining chair.
Designing layers without scenes
Independent circuits need a clear operating strategy. Otherwise the user switches on everything.
Using linear light as decoration without architecture
Random luminous lines date quickly. Integrated light should follow a reveal, edge, surface or function.
Forgetting maintenance
Drivers, profiles, adjustable fixtures and decorative lamps must remain accessible.
Planning after the ceiling is final
Layered lighting requires recesses, setbacks, power, control and joinery coordination. Late planning reduces the system to whatever fits.
A practical method for interior designers
Step 1: Write the activities
List what people do in each room, including occasional use, cleaning and late-night movement.
Step 2: Mark the important surfaces
Identify art, material, curtains, walls, tables, counters, mirrors, shelves and views.
Step 3: Create the visual hierarchy
Decide what the eye should see first, second and third.
Step 4: Assign lighting roles
Choose which ambient, task, accent, vertical, integrated, decorative and night layers are genuinely required.
Step 5: Select the method
Decide the distribution and mounting approach before choosing the product.
Step 6: Build circuits and scenes
Group luminaires according to effect and operation, not only by room.
Step 7: Calculate and review glare
Test task levels, uniformity where needed, vertical brightness, beam coverage and visible sources.
Step 8: Coordinate details
Resolve ceiling depth, wall setouts, joinery profiles, drivers, access, controls and decorative support.
Step 9: Mock up critical effects
Test wall washing, coves, materials, mirror light, joinery and decorative balance.
Step 10: Commission after completion
Aim adjustable fixtures, balance dimming levels, name scenes and train the user.
The simplest test is to switch layers on one at a time
During design review or commissioning, begin with the space dark.
Switch on one layer.
Ask what changed.
Did the wall gain depth? Did the table become the focus? Did faces improve? Did the path become clear? Did the art become visible? Did the decorative fixture gain presence?
Then add the next layer.
If a layer does not create a meaningful contribution, it may not be necessary. If two layers produce the same effect, they may need different roles or consolidation.
This sequential method makes the design legible and protects against the common habit of judging only the final all-on scene.
Layered lighting is really layered thinking
The value is not in having many switches.
It is in understanding that a room has several visual needs, and those needs change over time.
Good layered lighting can make a space brighter without increasing general light, more intimate without becoming too dark, more flexible without appearing technical and more luxurious without adding visual clutter.
The layers should not feel like separate effects. They should feel like different ways the same interior can live.
Developing an interior where the lighting needs greater depth and control?
Ashwamedha Design Solutions works with architects and interior designers to translate spatial intent into lighting layers, calculations, specifications, circuits, scenes, details and site commissioning.
Discuss your projectFrequently asked questions
What are the three basic layers of lighting?
The traditional three are ambient, task and accent lighting. Many interiors also benefit from vertical, integrated architectural, decorative and low-level night layers.
Does every room need all seven layers?
No. Each layer must have a clear purpose. A small room may need only two or three well-designed layers, while a large living room or hospitality space may need more.
Is cove lighting an ambient layer?
It can be, depending on its output, location and the surface it illuminates. A cove is a lighting method, not automatically a complete layer.
Should every lighting layer be on a separate circuit?
Not always, but layers that need independent dimming, scene control or different operating times should be separated. Circuiting should follow function and use.
What is the best way to present layered lighting to a client?
Show the space from a dark base and add one circuit at a time. Explain what each layer contributes, then show the combined scenes. This is clearer than presenting only an all-on render.